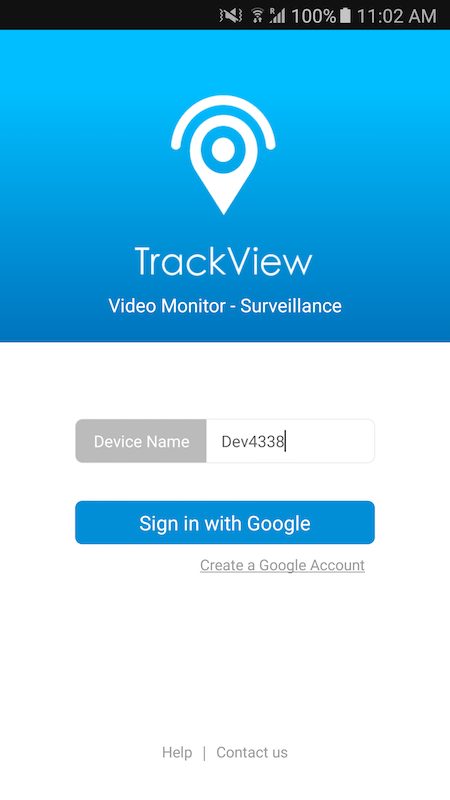
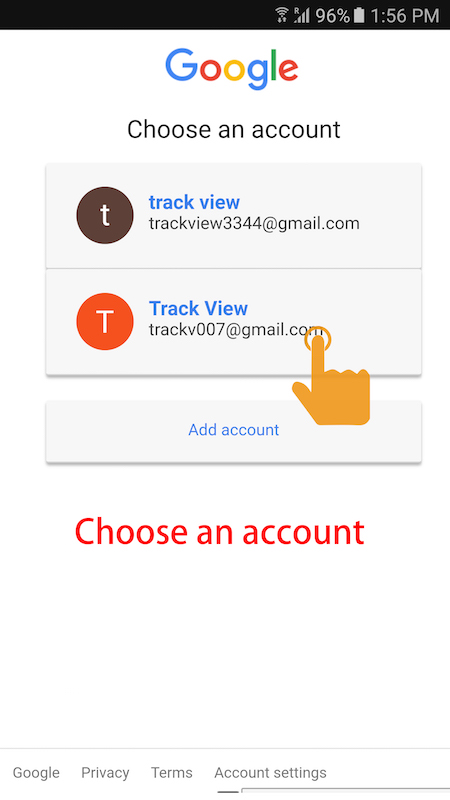
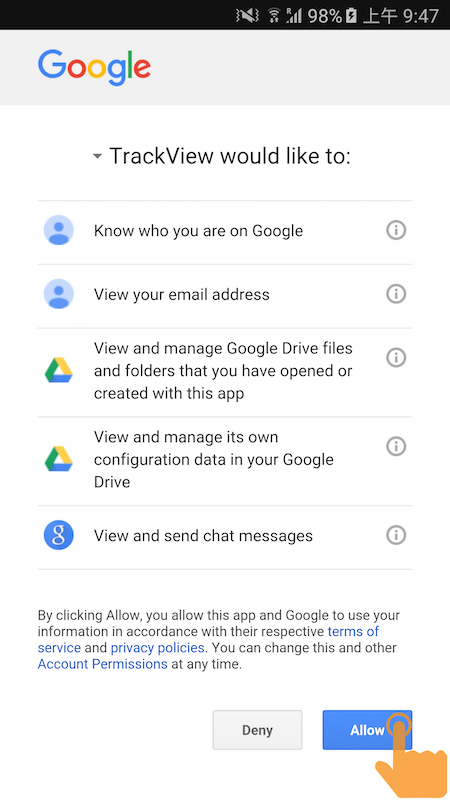
Please use your Google account to login to TrackView.
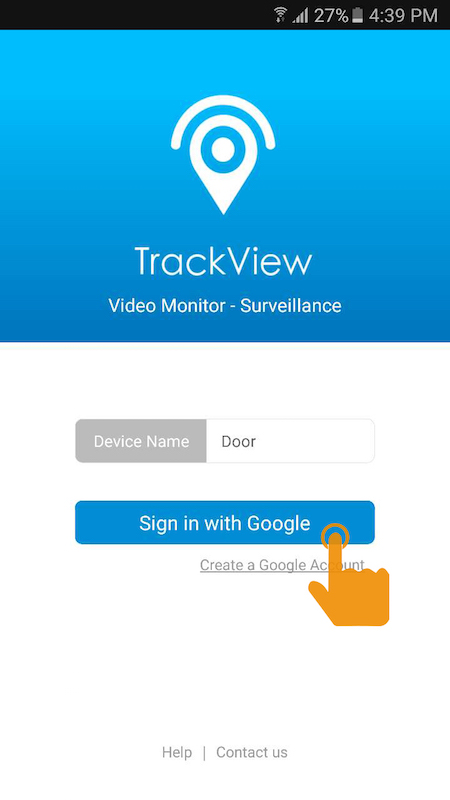
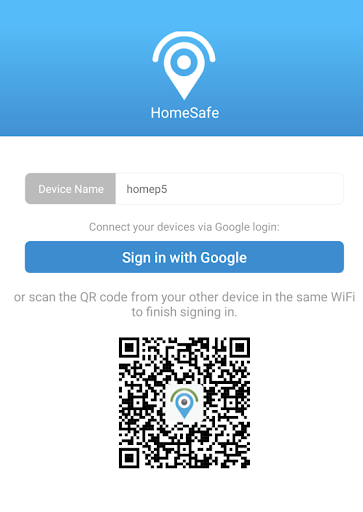
The field Device Name on login page is used to differentiate your multiple devices. User can enter a unique name with a maximum of seven letters or numbers. If left blank, it will be auto filled with "Dev****", where **** is a random number generated by the app. In our example, the device name is entered as "Door".
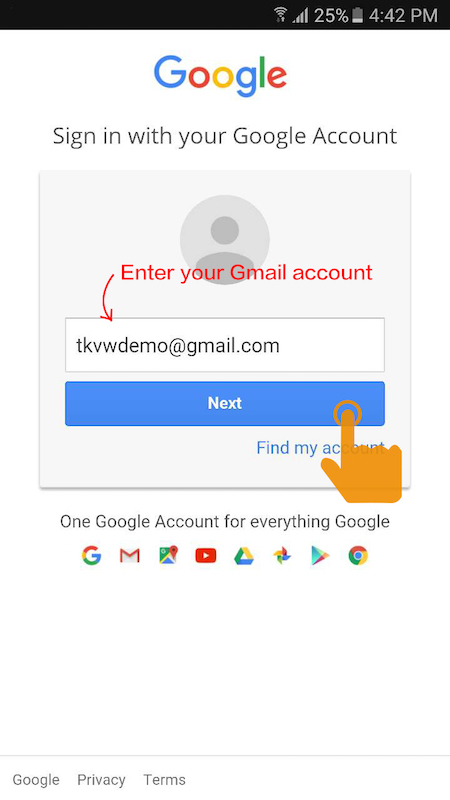
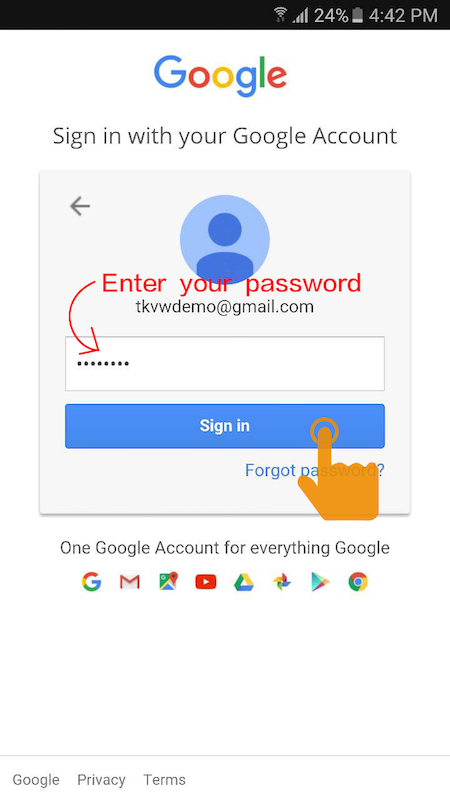
If you are logging into TrackView for the first time:

If you logged into TrackView before:
Note: You need to login on to TrackView on multiple of your devices, so that they can be connected together.
a. Install and Login to TrackView on one of your devices (Device A)
b. Install TrackView on another device (Device B), and make sure both Devices are connected to the same WiFi network.
c. Open TrackView on the remote Device B and you will see a QR code on the login page.
d. From Device A, open TrackView and go to the “Devices” tab; click the “Scan QR code” icon on the top-right corner.
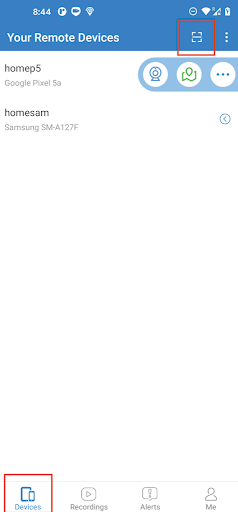
e. Scan the QR code on Device B.
f. Follow instructions on Device A to finish the login process.
g. Now Device B should be logged in as well with the same Google Account.
Cloud recording is a great feature which allows User to use Google Drive to backup and share their recordings among different devices. It's especially helpful when you miss an alert and want to playback the event happened on other devices. User can turn on/off this feature based on your needs.
The following is an example on how to use cloud recording.
Step-by-step instructions:
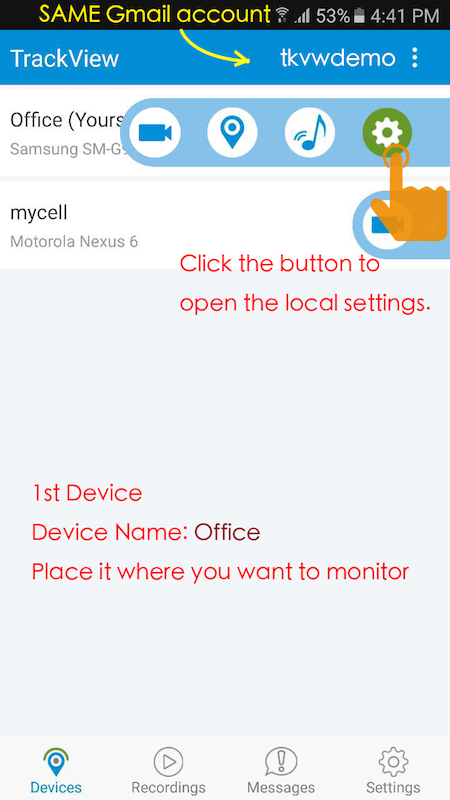
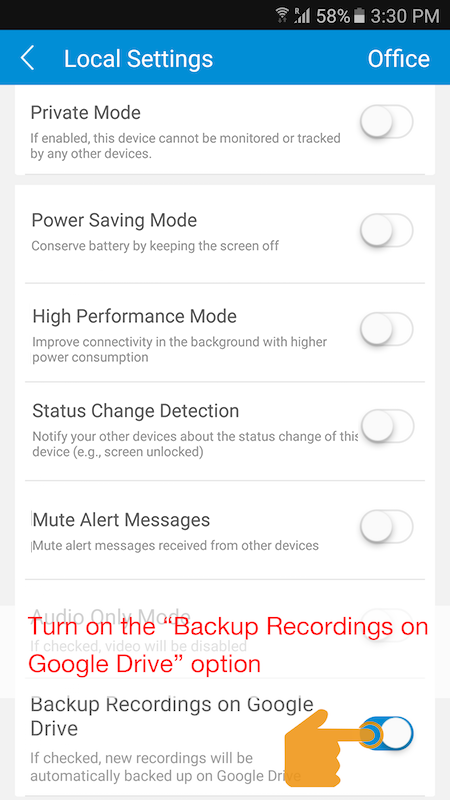
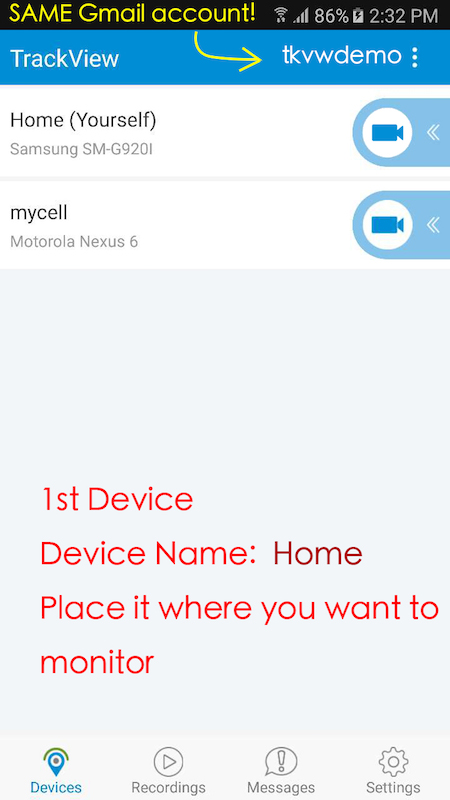
Step 1 Log into TrackView on both of your devices. Place one of them where you want to monitor. In our example, Device "Office" is placed in the office. Turn on the cloud recording feature by checking ”Backup Recordings on Google Drive” on the Settings tab of TrackView.
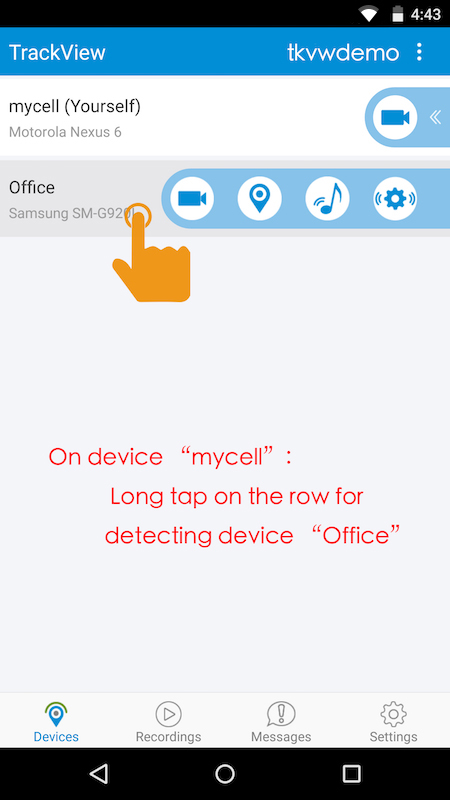
Step 2 You can start the remote detection on Device “Office” by following the instructions below:
figure 1
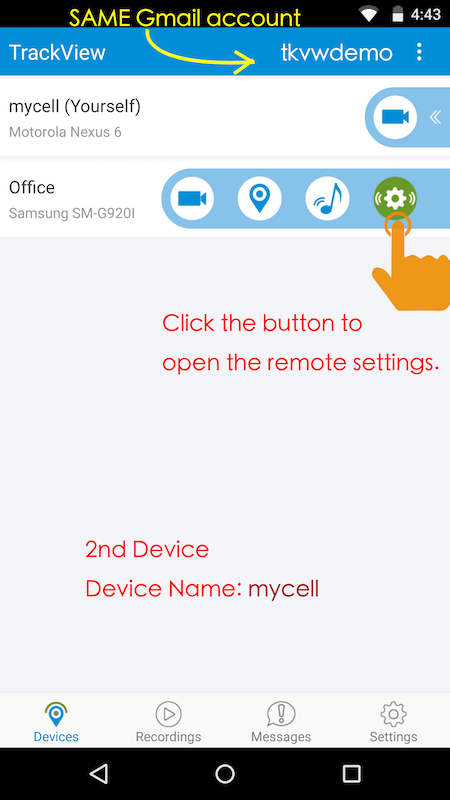
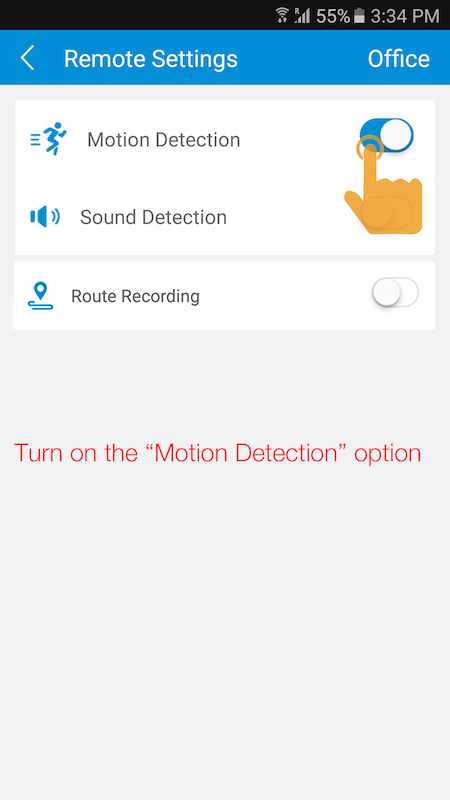
figure 2
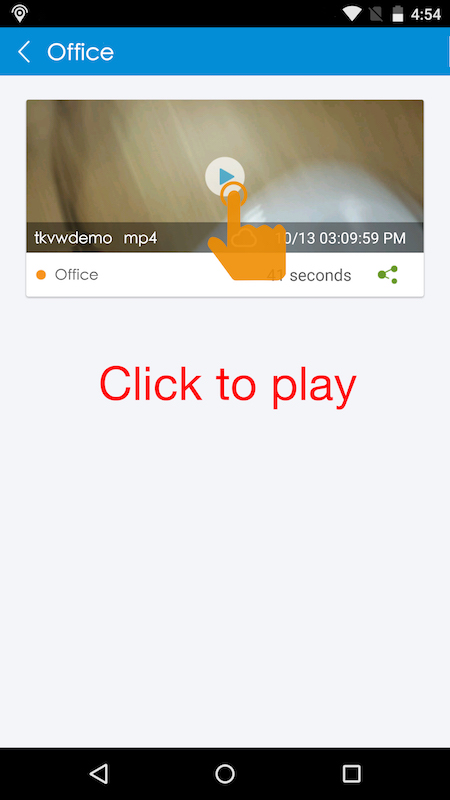
Step 3 When the device “Office” detects sound or motion,it will automatically start video recording. The detection triggered recordings will be saved on the local storage of "Office", and also uploaded to your Google Drive at same time.
.png)
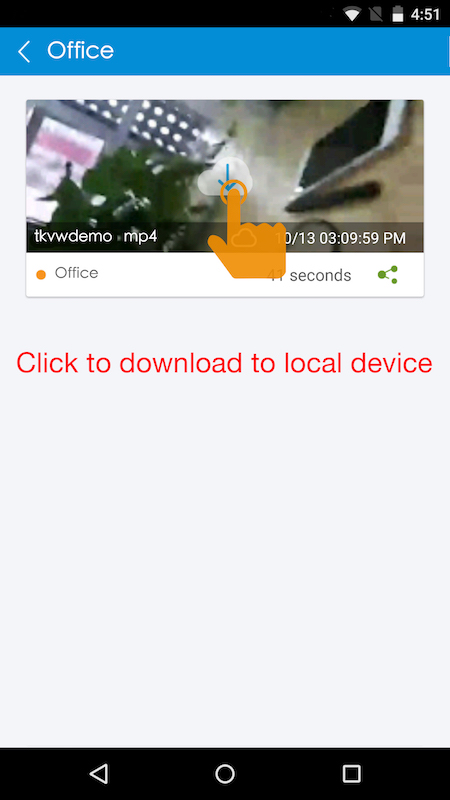
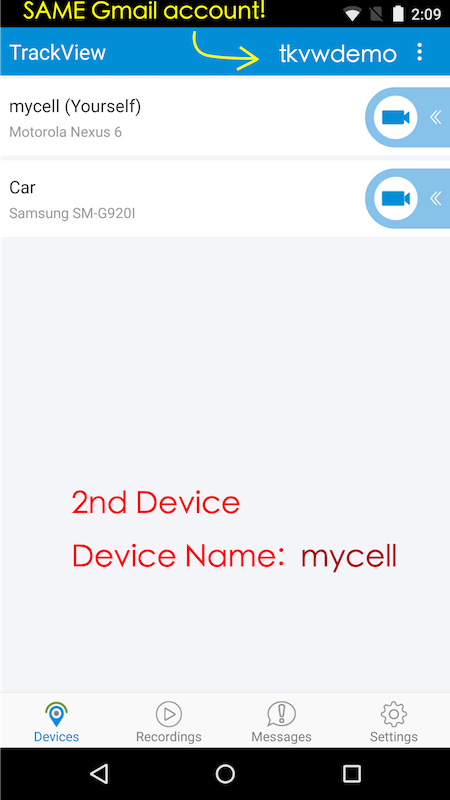
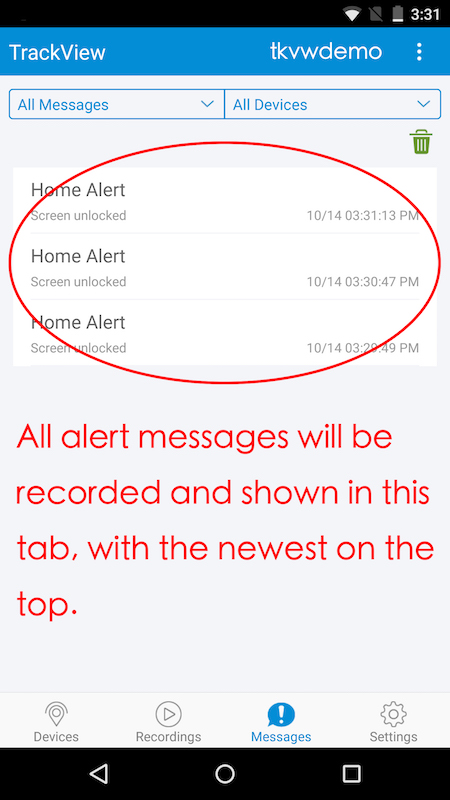
Step 4 The device "mycell" will simultaneously receive the alert notification from "Office" upon detection. On the Playback tab, the little Red Dot with a number in it indicates the new recordings have been uploaded to the Google Drive.
.png)
Note:
(1) If you have other devices logged in with the same Gmail account, you will also be able to download and playback the recordings from Google Drive on those devices.
(2)With"Backup Recordings on Google Drive"option checked, the local recording will be automatically upload to your Google Drive during a normal video monitoring session.
Step-by-step instructions:
Step 1 Login on both of your devices.
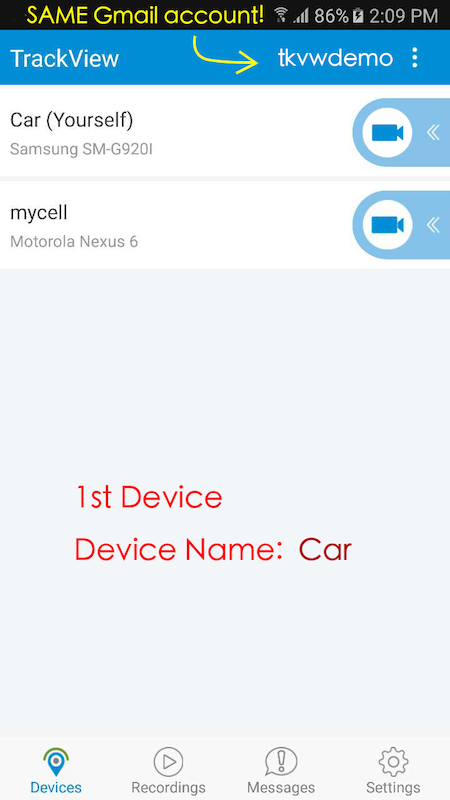
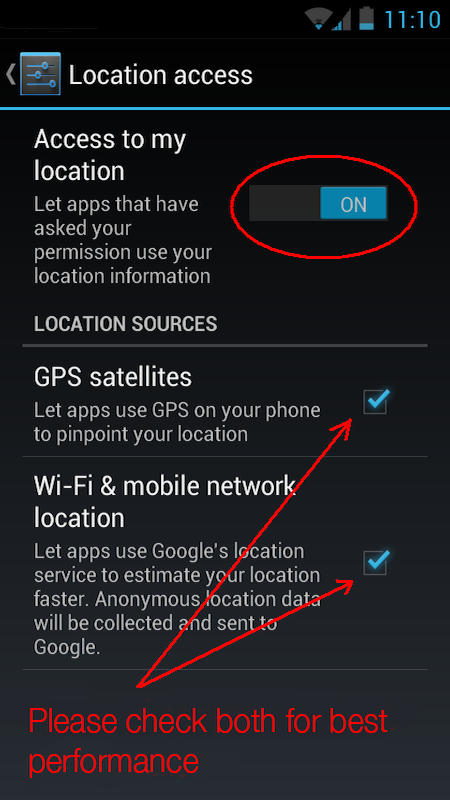
Step 2 Make sure to turn on GPS function on the device being tracked. In this example, the 1st device "Car" is the target device. Configure "Car" as below:

Step 3 Click on tracking button on the row of 1st device ("Car") from the tracking device "mycell".
[Note] You can view the detailed address of the remote device by clicking on the balloon. The map can also be displayed in satelite mode.
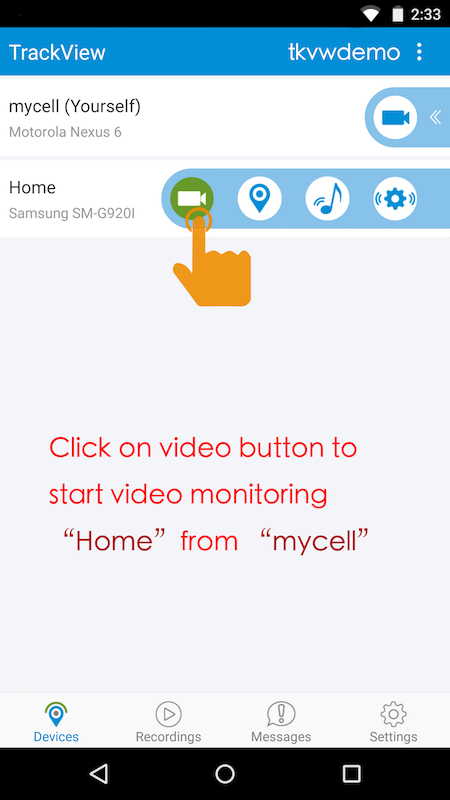
An example of home surveilliance is used here to show how to do the video monitoring.
Log into TrackView on both of your devices. Place one of them where you want to monitor. In our example, Device "Home" is placed in the living room.
Start video monitoring by click on the video button.
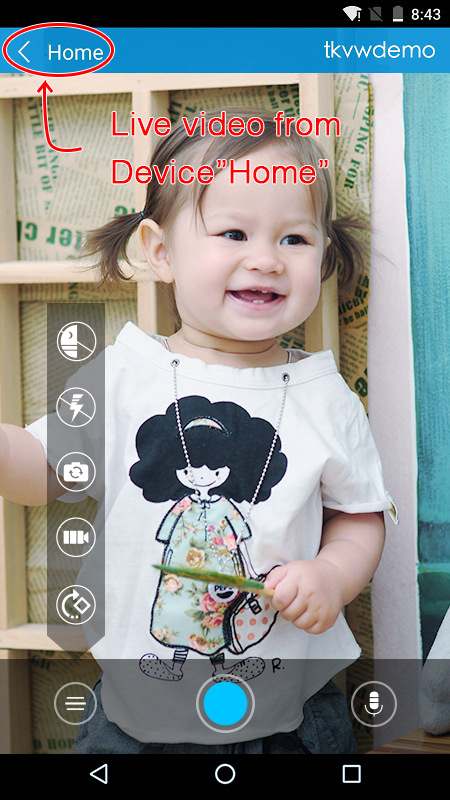
Continue with the example for IP Camera . If you missed the previous steps, plese go back and see the instructions in IP Camera
On the video page, tap anywhere on the screen. A menu bar will slide in from the bottom. Click on the Record button on the menu bar will start the remote recording.
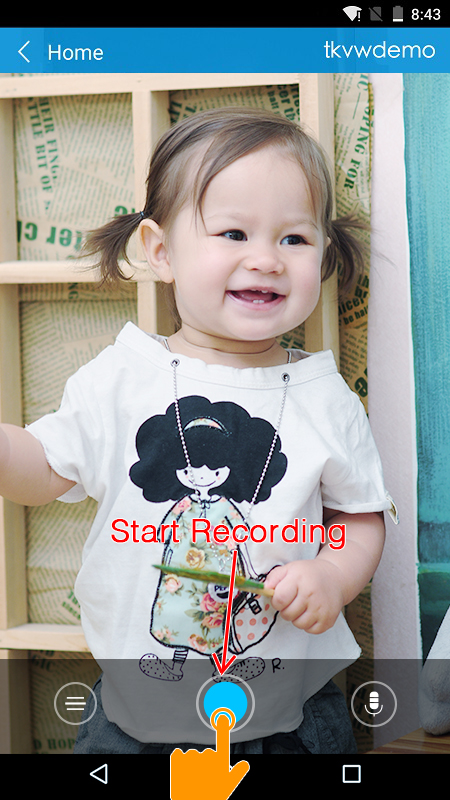
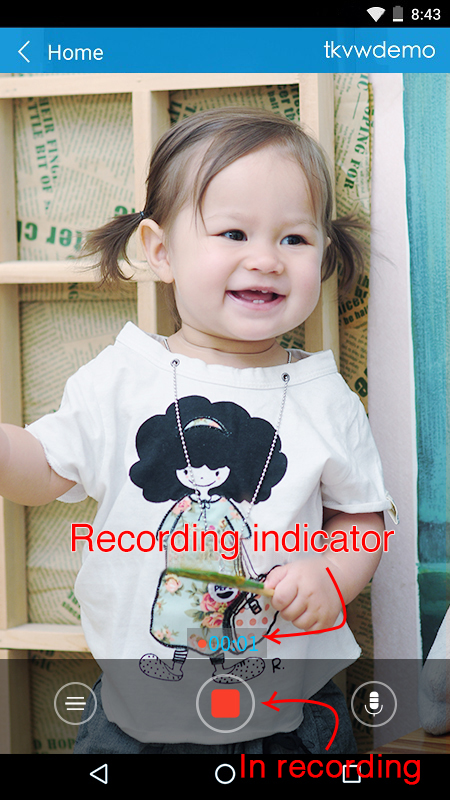
Tip: The recorded videos are stored in the device from which you are viewing (In our example, the video is stored in Device "mycell").
When you are on the video page, user could talk to the remote audience by pressing the Push-to-Talk (PTT) button.
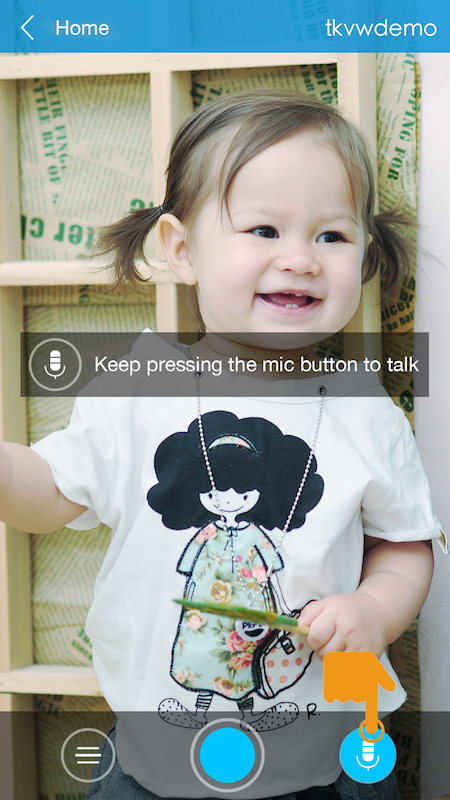
Please be noted, you need to keep pressing the button until you finish talking.
Continue with the example in IP Camera.
When you are on the video page, User could switch the camera on the remote device simply by pressing the camera switch button.
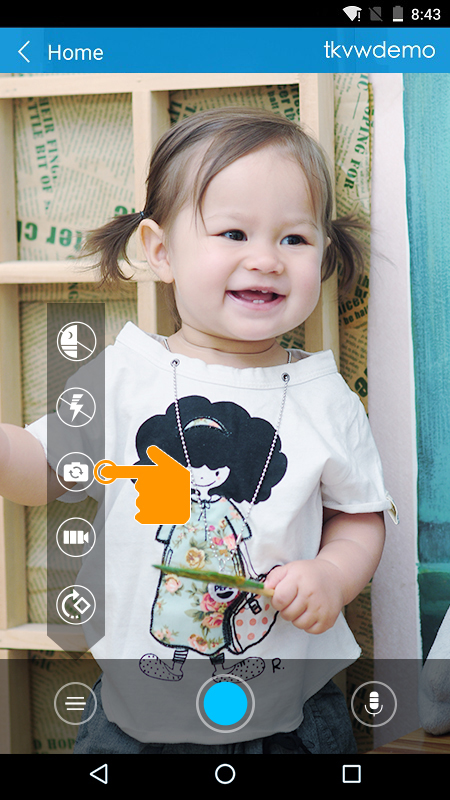
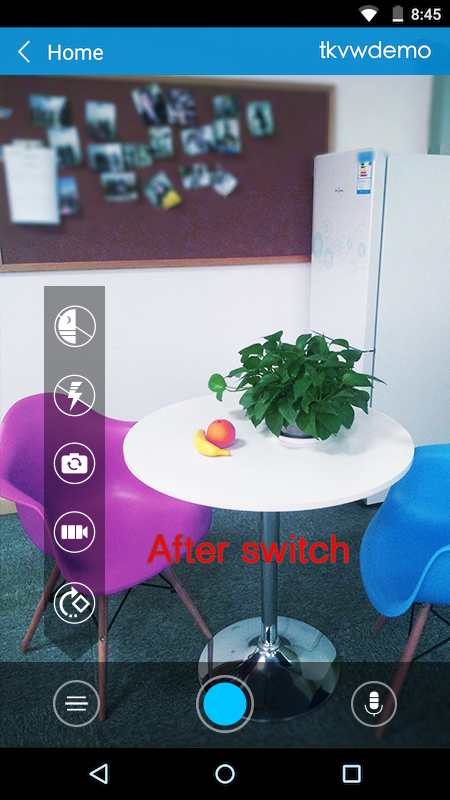
If the remote device has only one camera, pressing this button will have no effect.
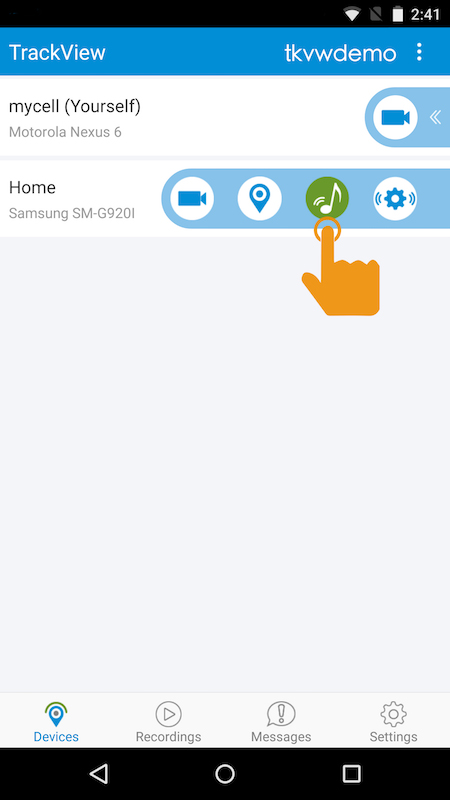
"Remote buzz" means you can ring your remote devices via TrackView. This is a great feature which can be used to help you locate and find your devices.
After you log in TrackView on your devices (at least two devices), click on the Buzz button from the device at your hand to ring other TrackView devices that are connected.
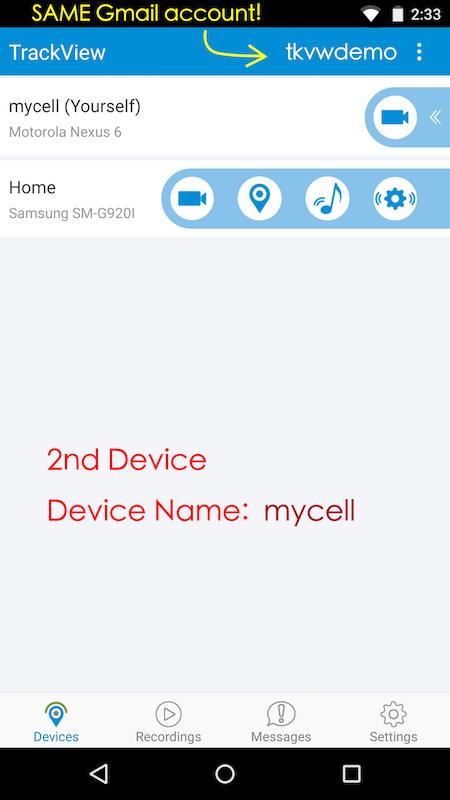
In our example, click the buzz button on device "mycell", the Device "Home" will ring even if it's in silent mode.
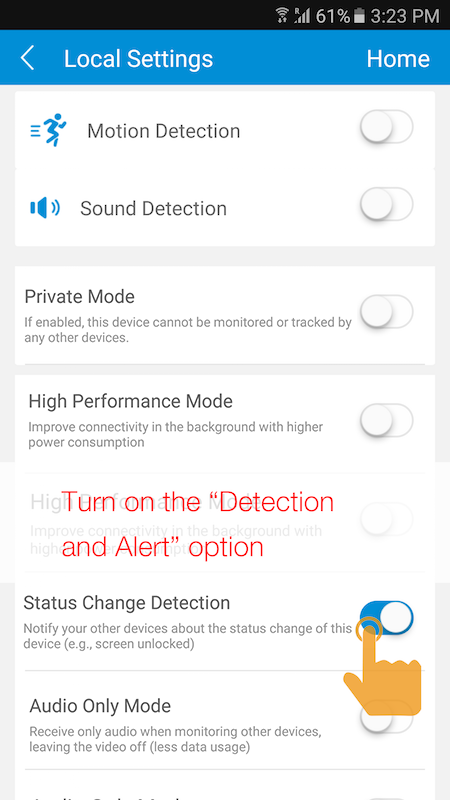
TrackView detects following three types of hardware events:
For Device “mycell” to receive the event alert from Device “Home”, please turn on the option “Detection and Alert” on Device “Home” (this will enable Device “Home” to send out event alerts to other linked devices, e.g., “mycell”).
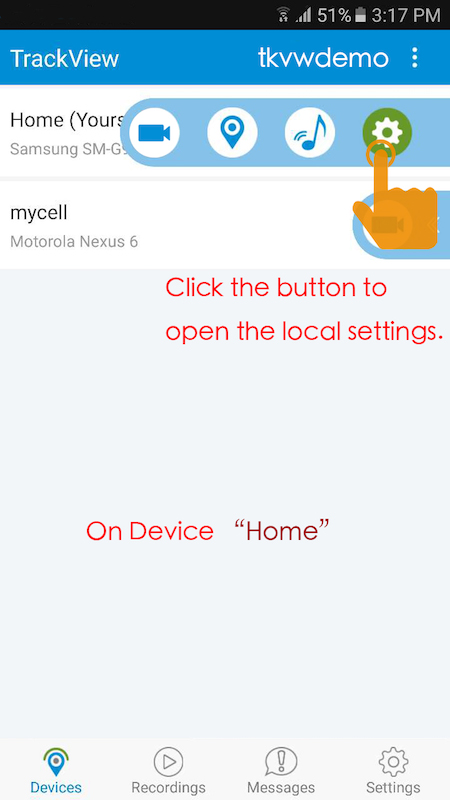
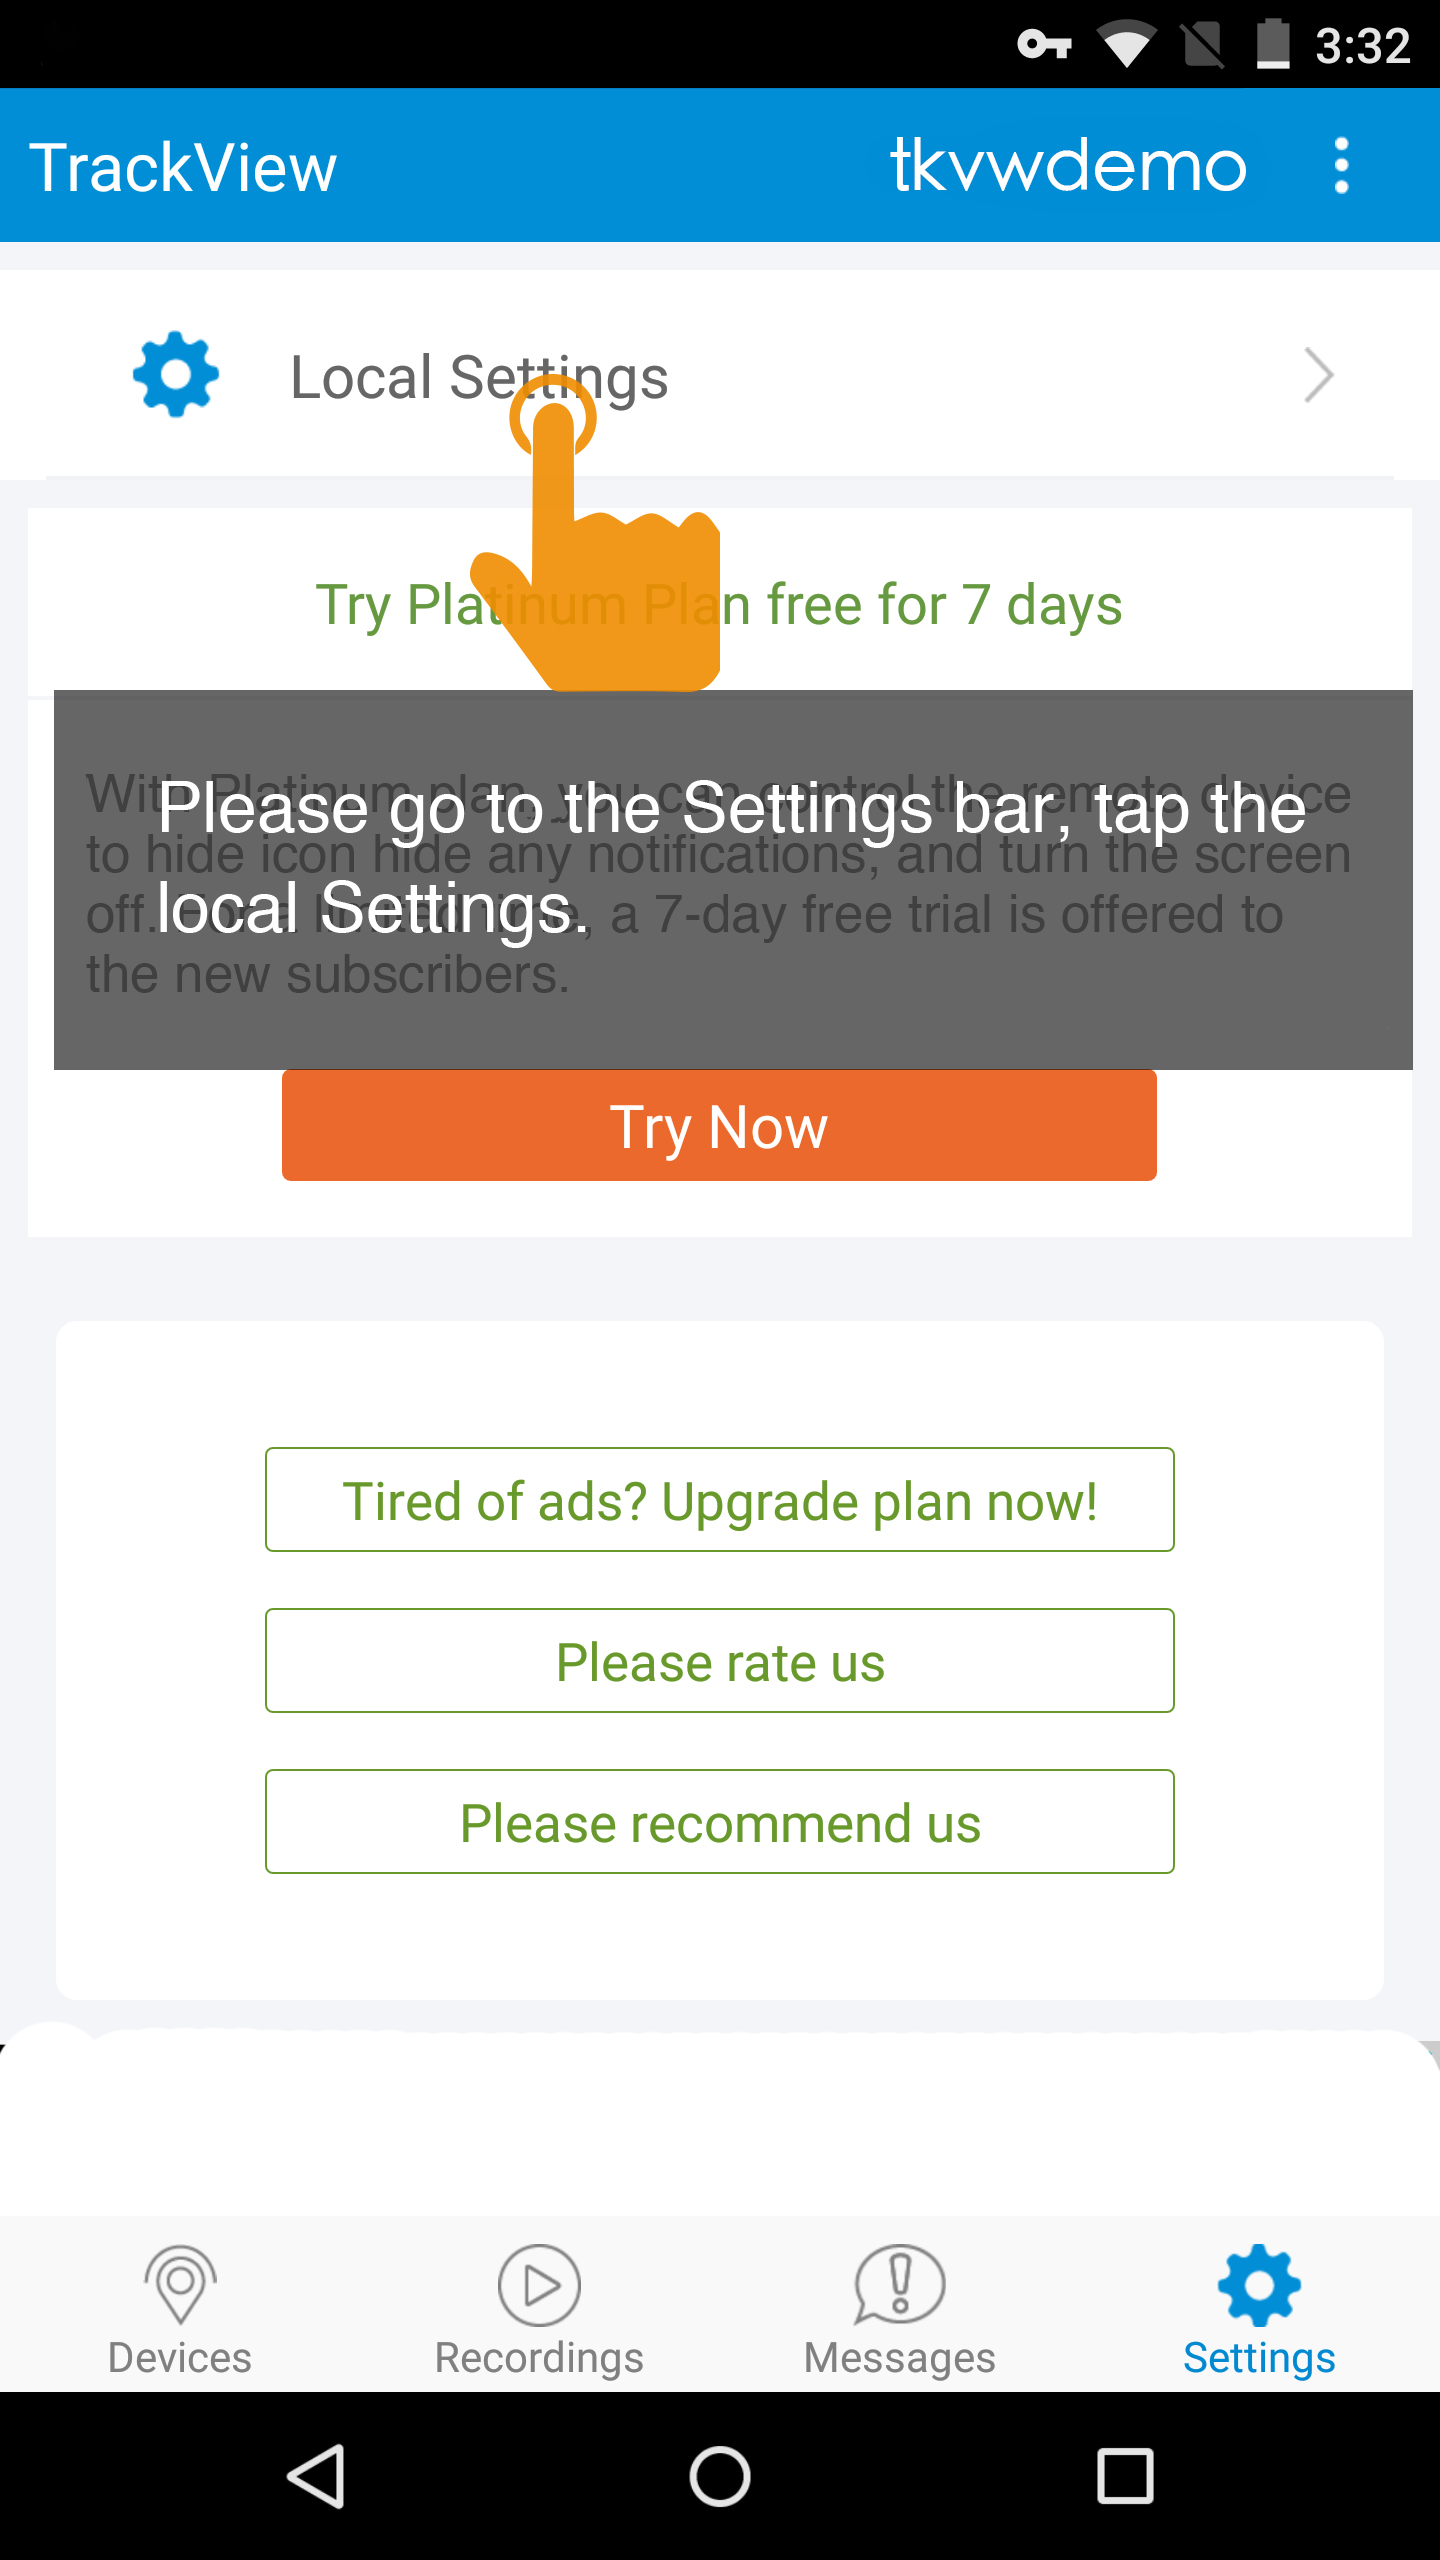
You can also go to the Settings bar, tap the Local Settings,and it will take to the Local Settings page.
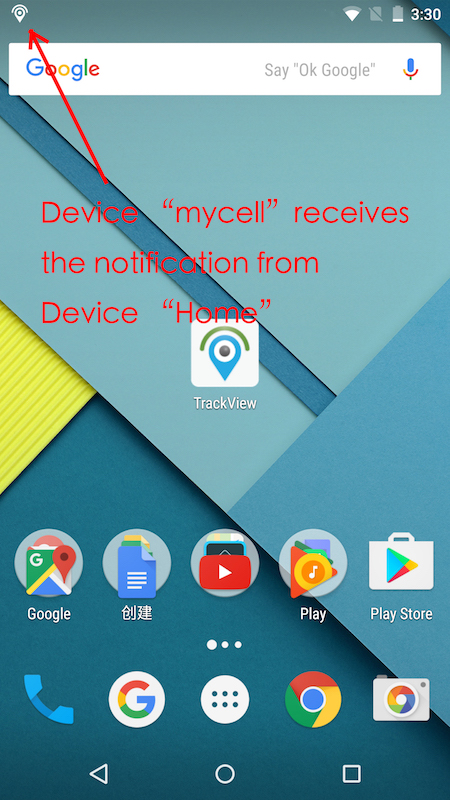
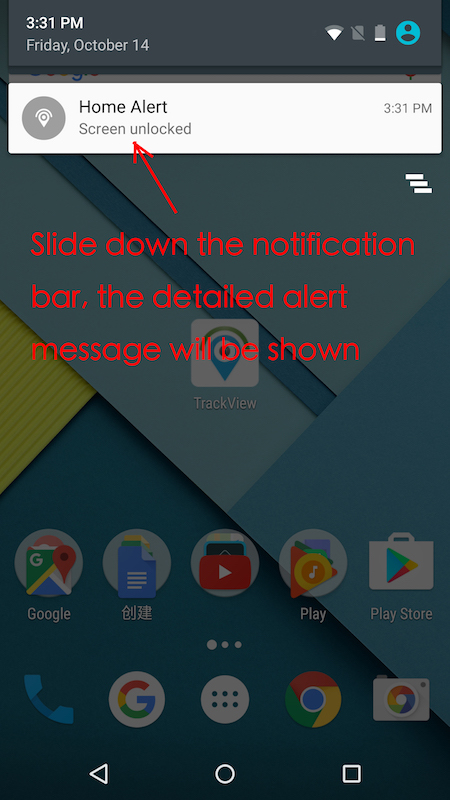
Once there is an event occurred on Device "Home" (e.g. the screen is unlocked on Device "Home"), you can instantly see the notification received on Device "mycell":
The alert message also comes with a sound and a vibration. To disable the sound, the "Mute Alert Messages" on Device "mycell" need to be checked (The vibration will still be on):
The Motion & Sound Detection feature uses the camera and microphone on your mobile device or PC to detect movements or unusual sound in the surrounding area using our advanced motion & sound detection algorithm.
If any movement or sound is detected, the following actions will take place on the detecting device automatically and instantly:
TrackView Motion & Sound Detection allows you to remotely monitor an area using your TrackView devices.
There are 2 ways to start the motion and/or sound detection on TrackView devices:
Using this method is to enable your local device as a detecting device, i.e., you are using your local device to detect motion or sound.
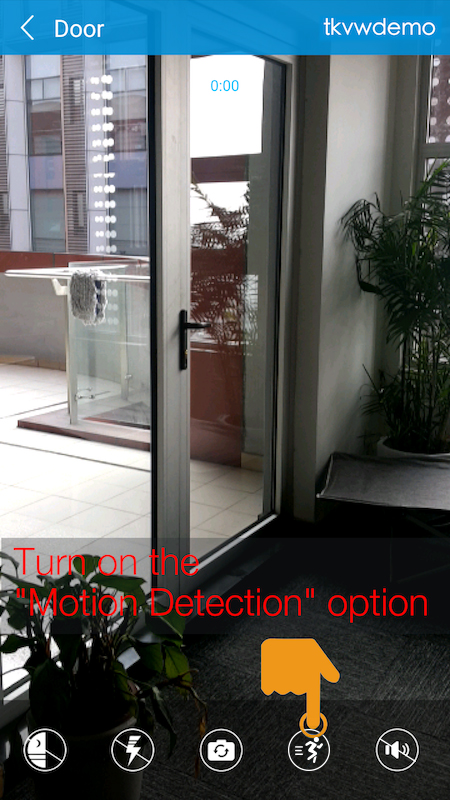
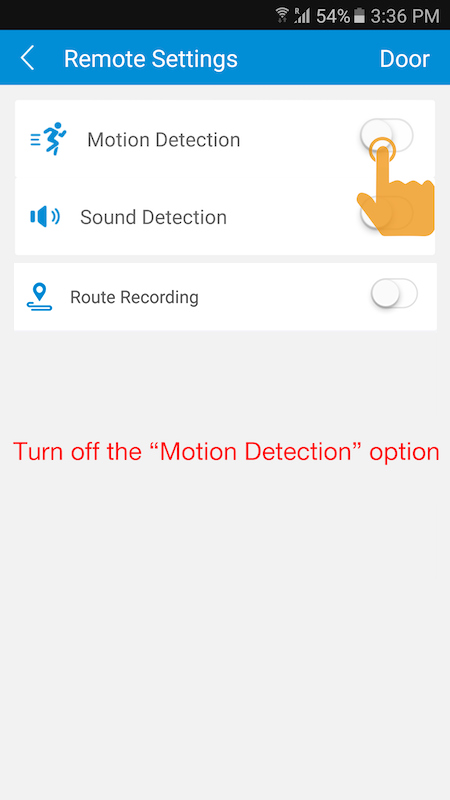
If you turn on the "Motion detection" option:
.png)
If you turn on the "Sound detection" option:
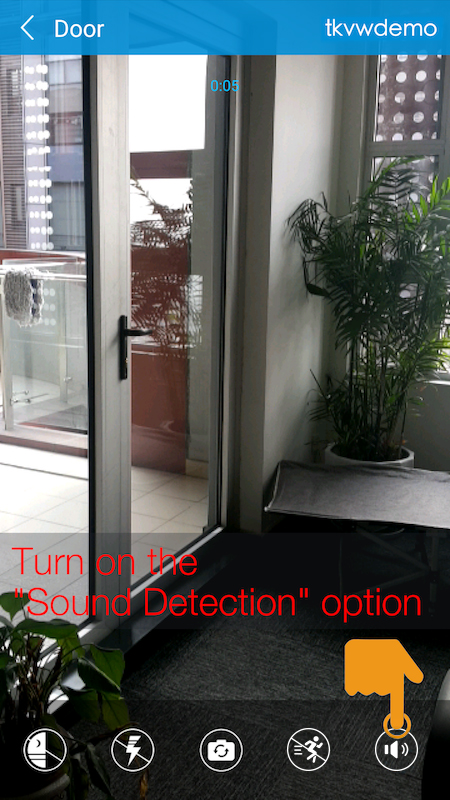
.png)
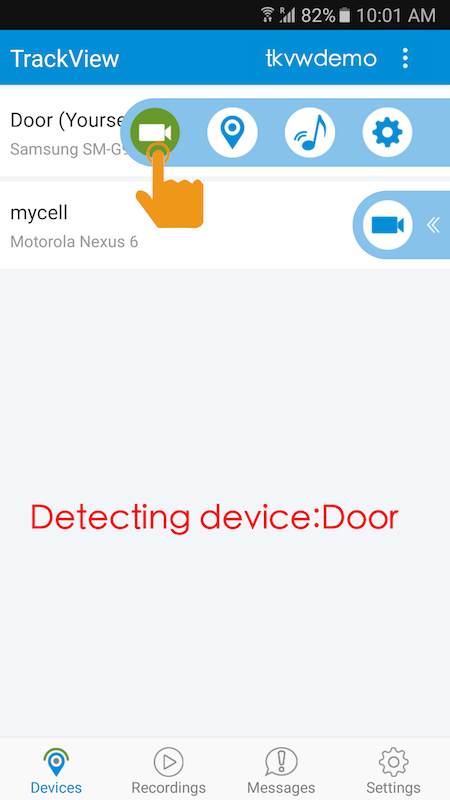
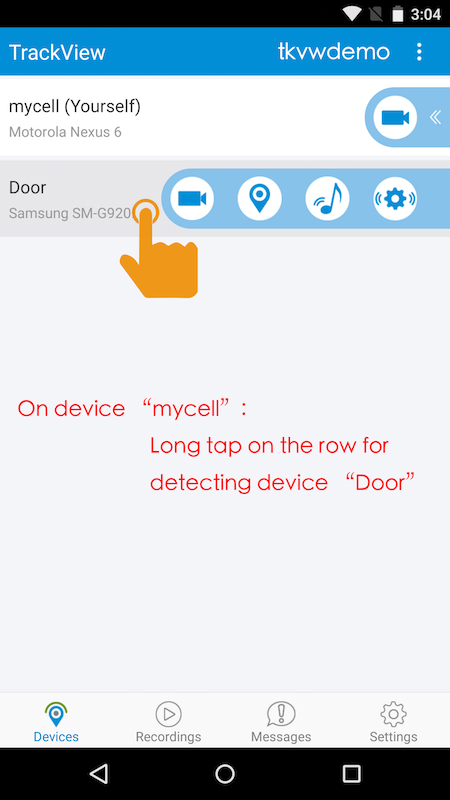
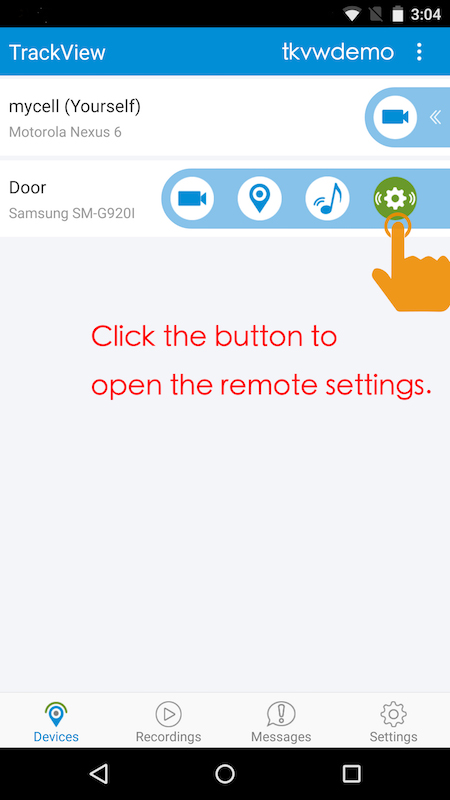
Using this method is to enable your remote device as a detecting device. For example, when you leave a TrackView device ("Door") at home, and you can remotely start the motion/sound detection on this home device ("Door") when you are at work using an other device ("mycell").
The setup steps are very similiar as the local detection control. The only difference is that the setting is now on your non-detecting device ("mycell").

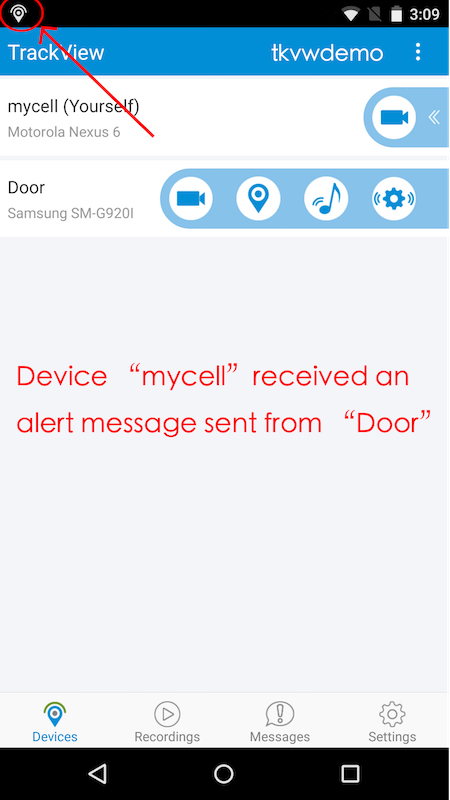
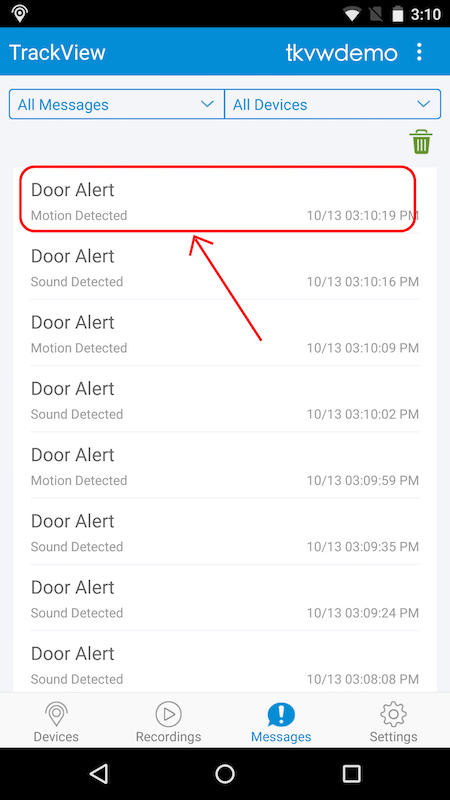
When a detection is triggered, the detecting device will start recording and send alert messages to all other connected devices, including device "mycell" (see screens below).
To stop remote detection, long press again on the row for detecting device ("Door") and then click on "Stop Detection" on the popup window (see screens below).
Install TrackView Night Vision version on your devices. From the monitoring device, click the night vision icon on the video page to turn the night vision mode on.
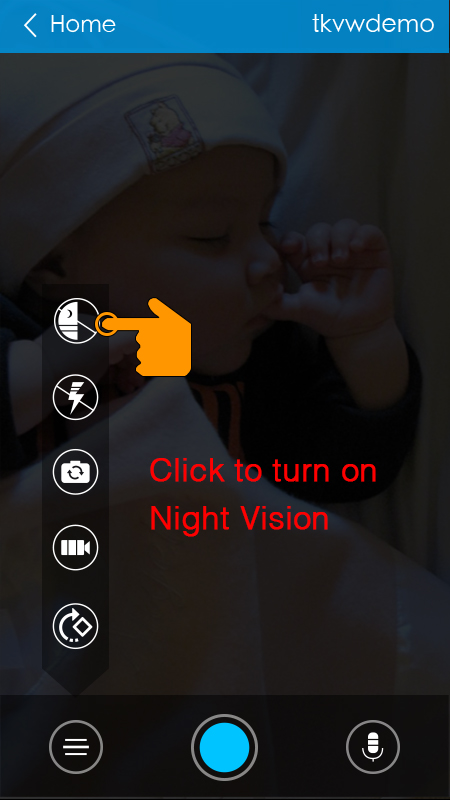
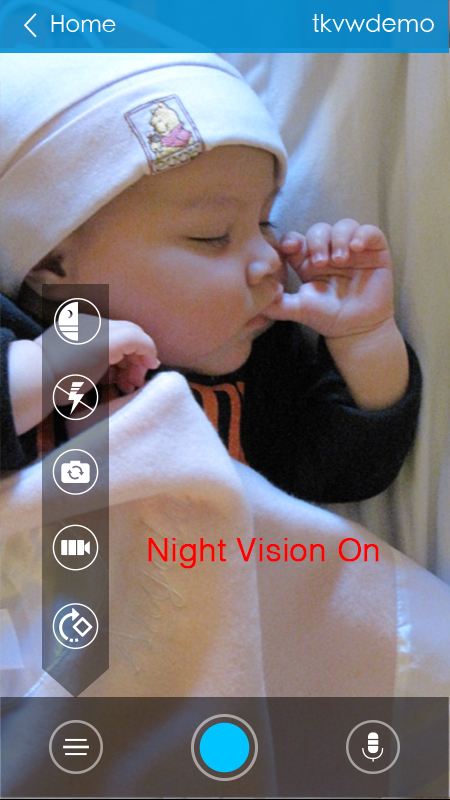
Note: In order for the night vision mode to work, a minimal lighting condition is required. When it's completely dark, it will not show clear video.
Install TrackView Night Vision version on your devices. From the monitoring device, click the flash icon on the video page to turn the flash on.
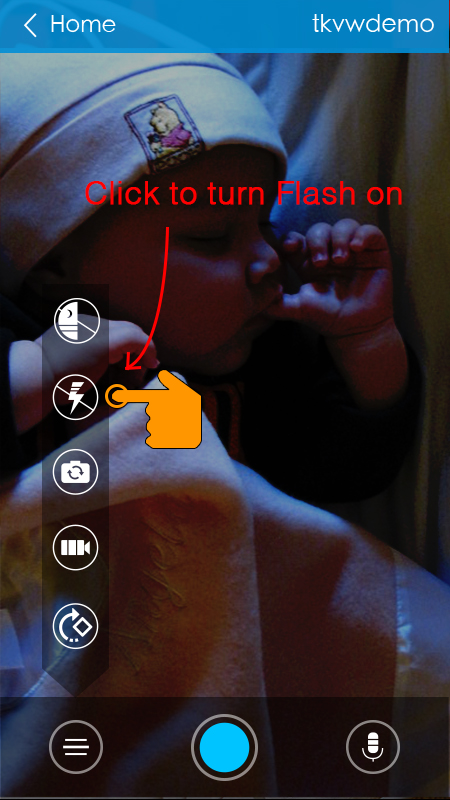
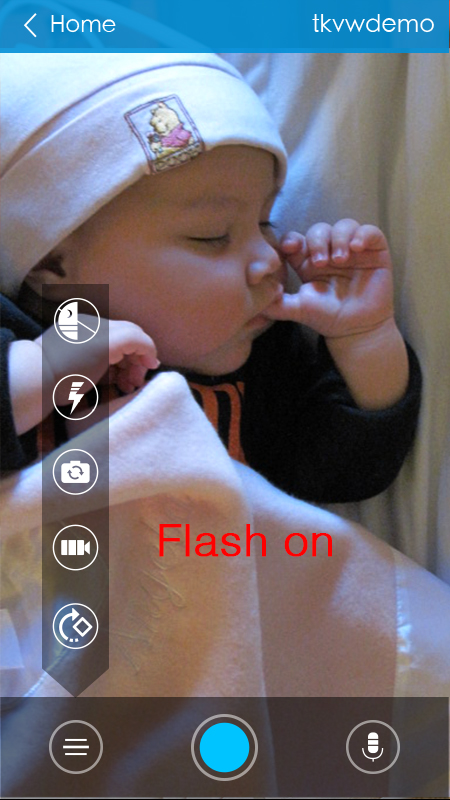
Note: for all Android devices, only rear camera has a flash. If the device has only a front facing camera, this function will take no effect.
TrackView will remain logged in until you manually log it out. To logout, please tap on the system menu icon (three vertical dots), and select "Log Out" from the dropdown menu.
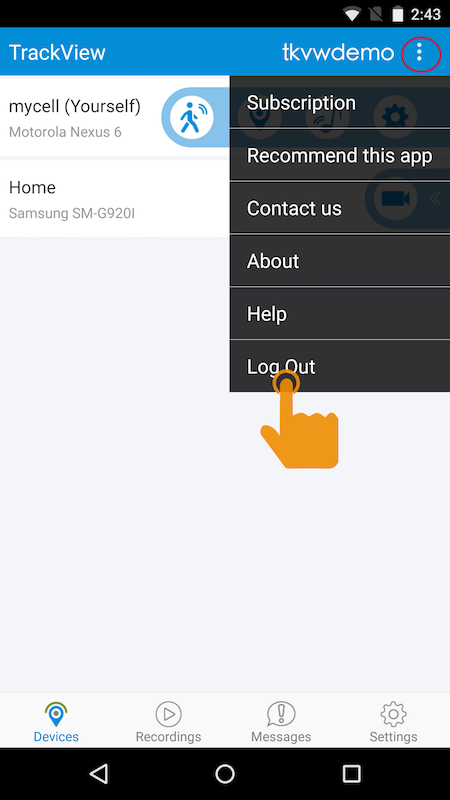
Note: Once manually logged out, TrackView cannot automatically log back in until user manually login again.